What Is a LifeRoom?

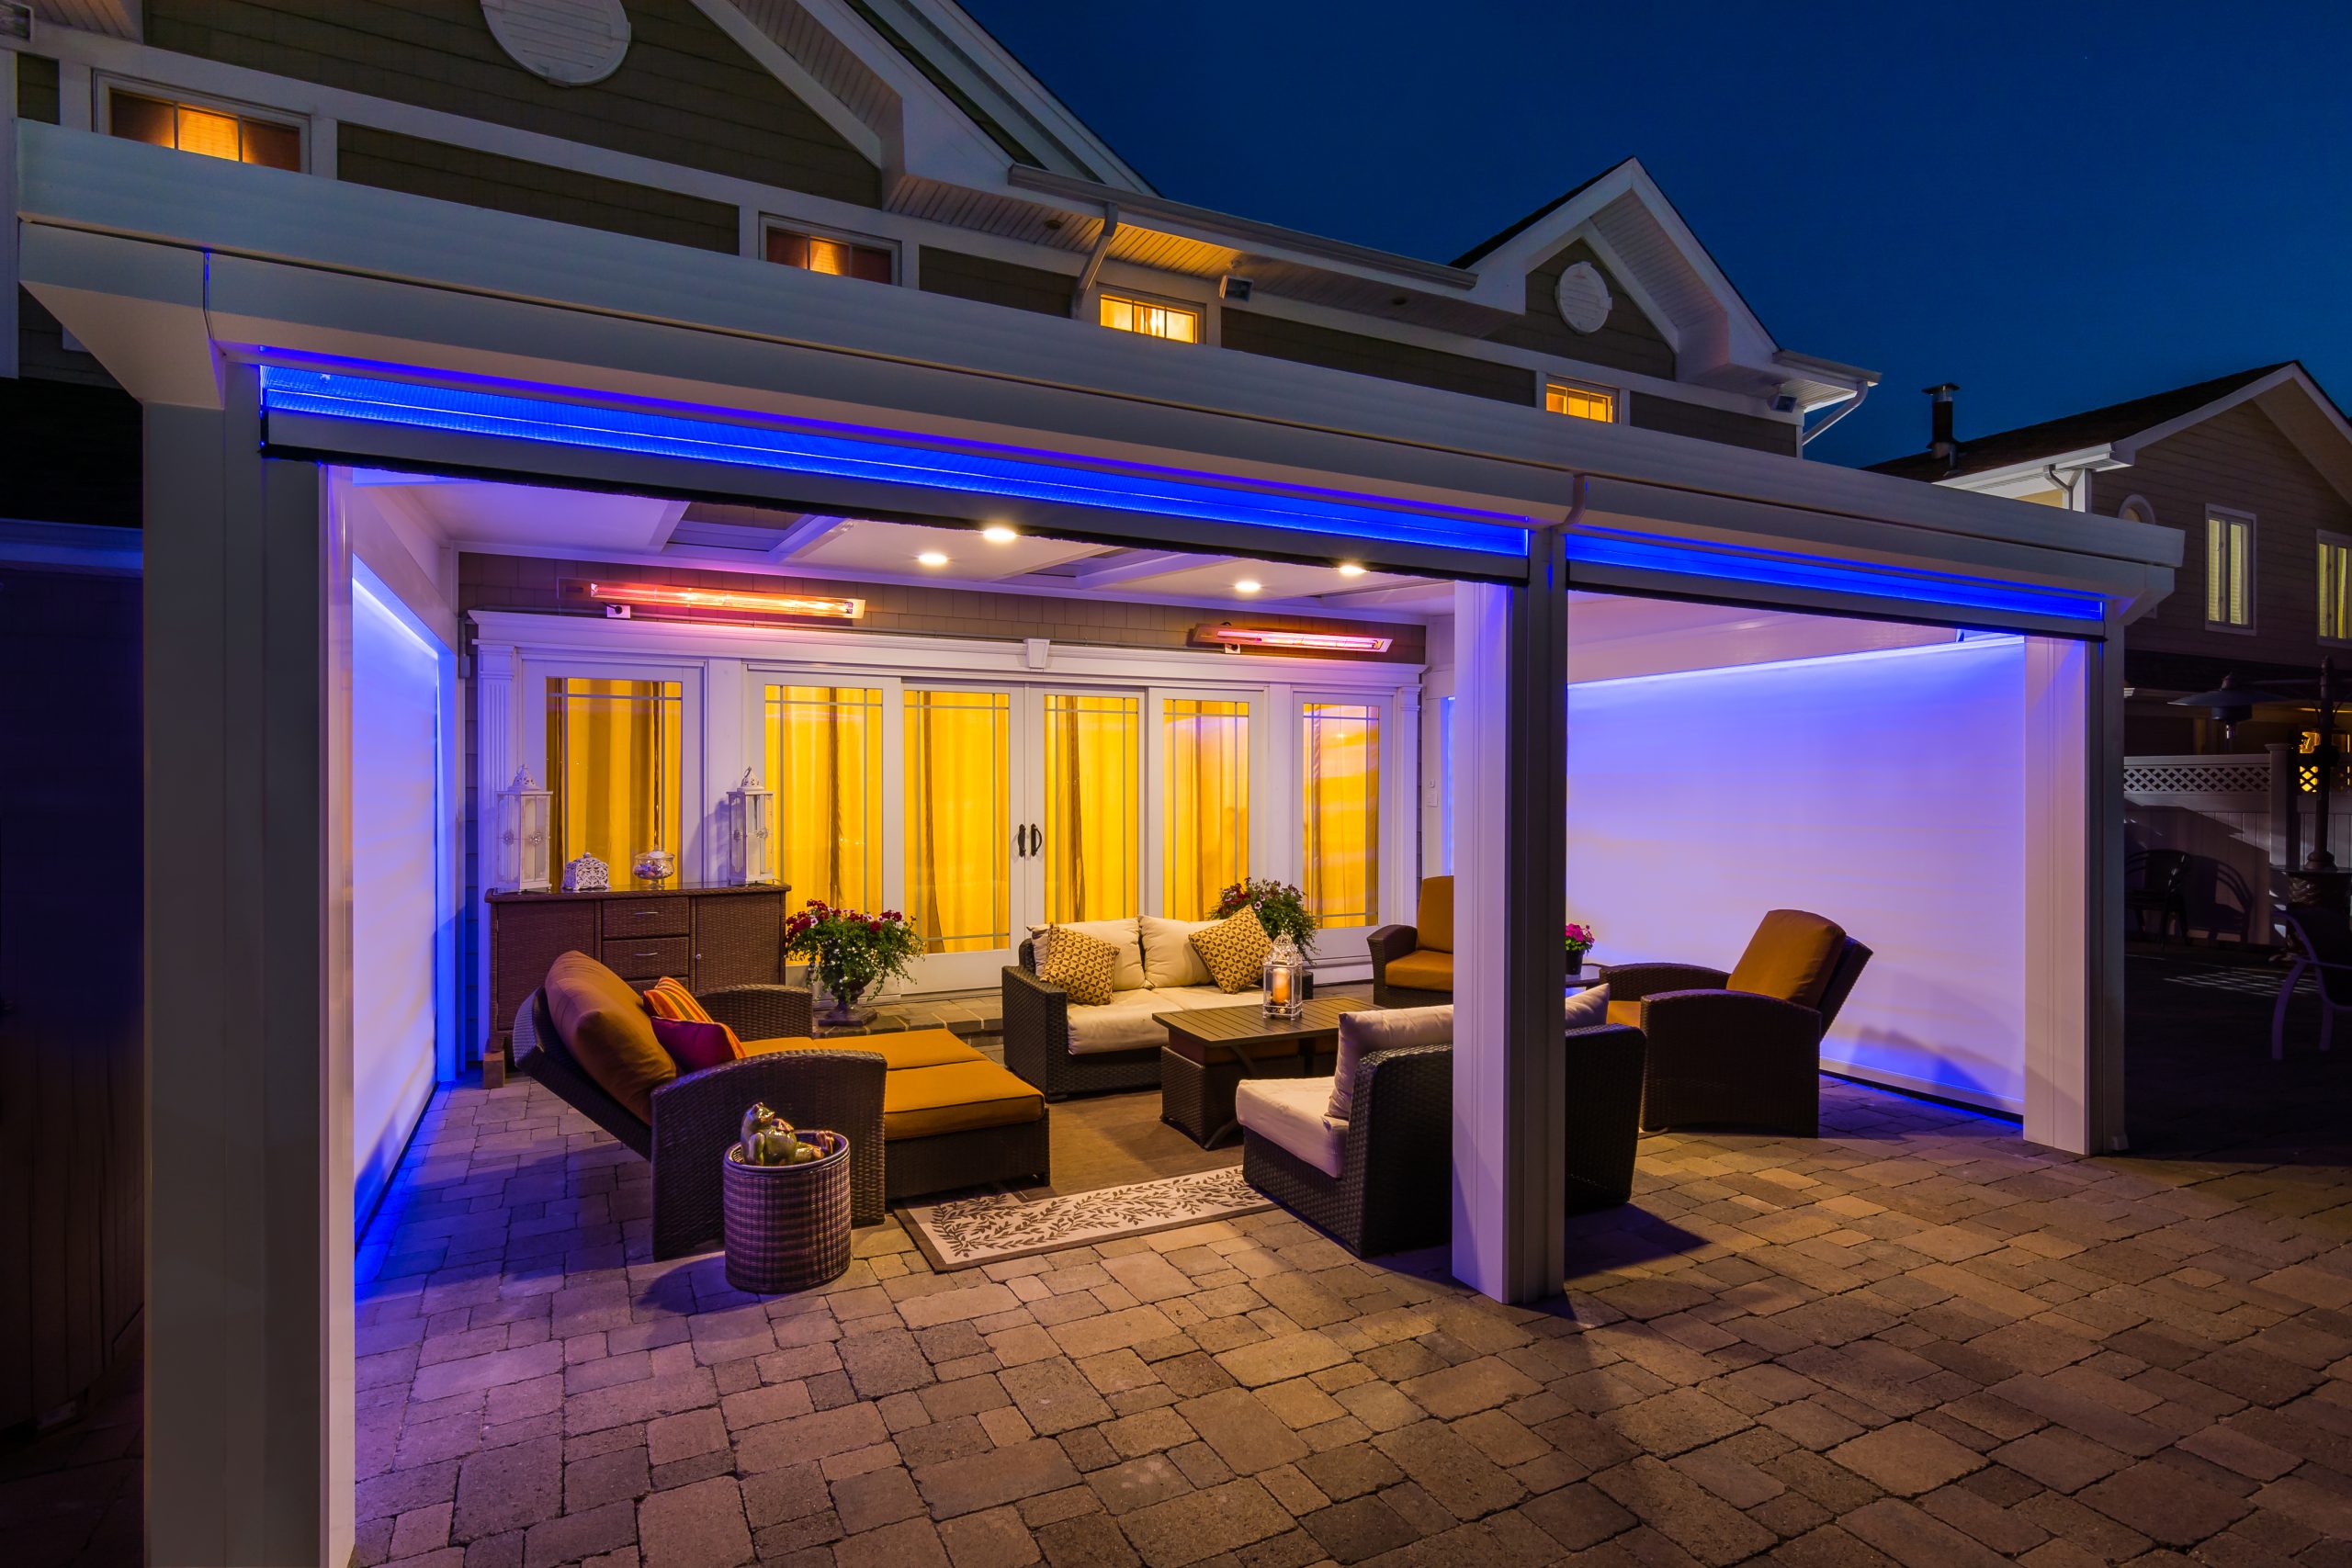
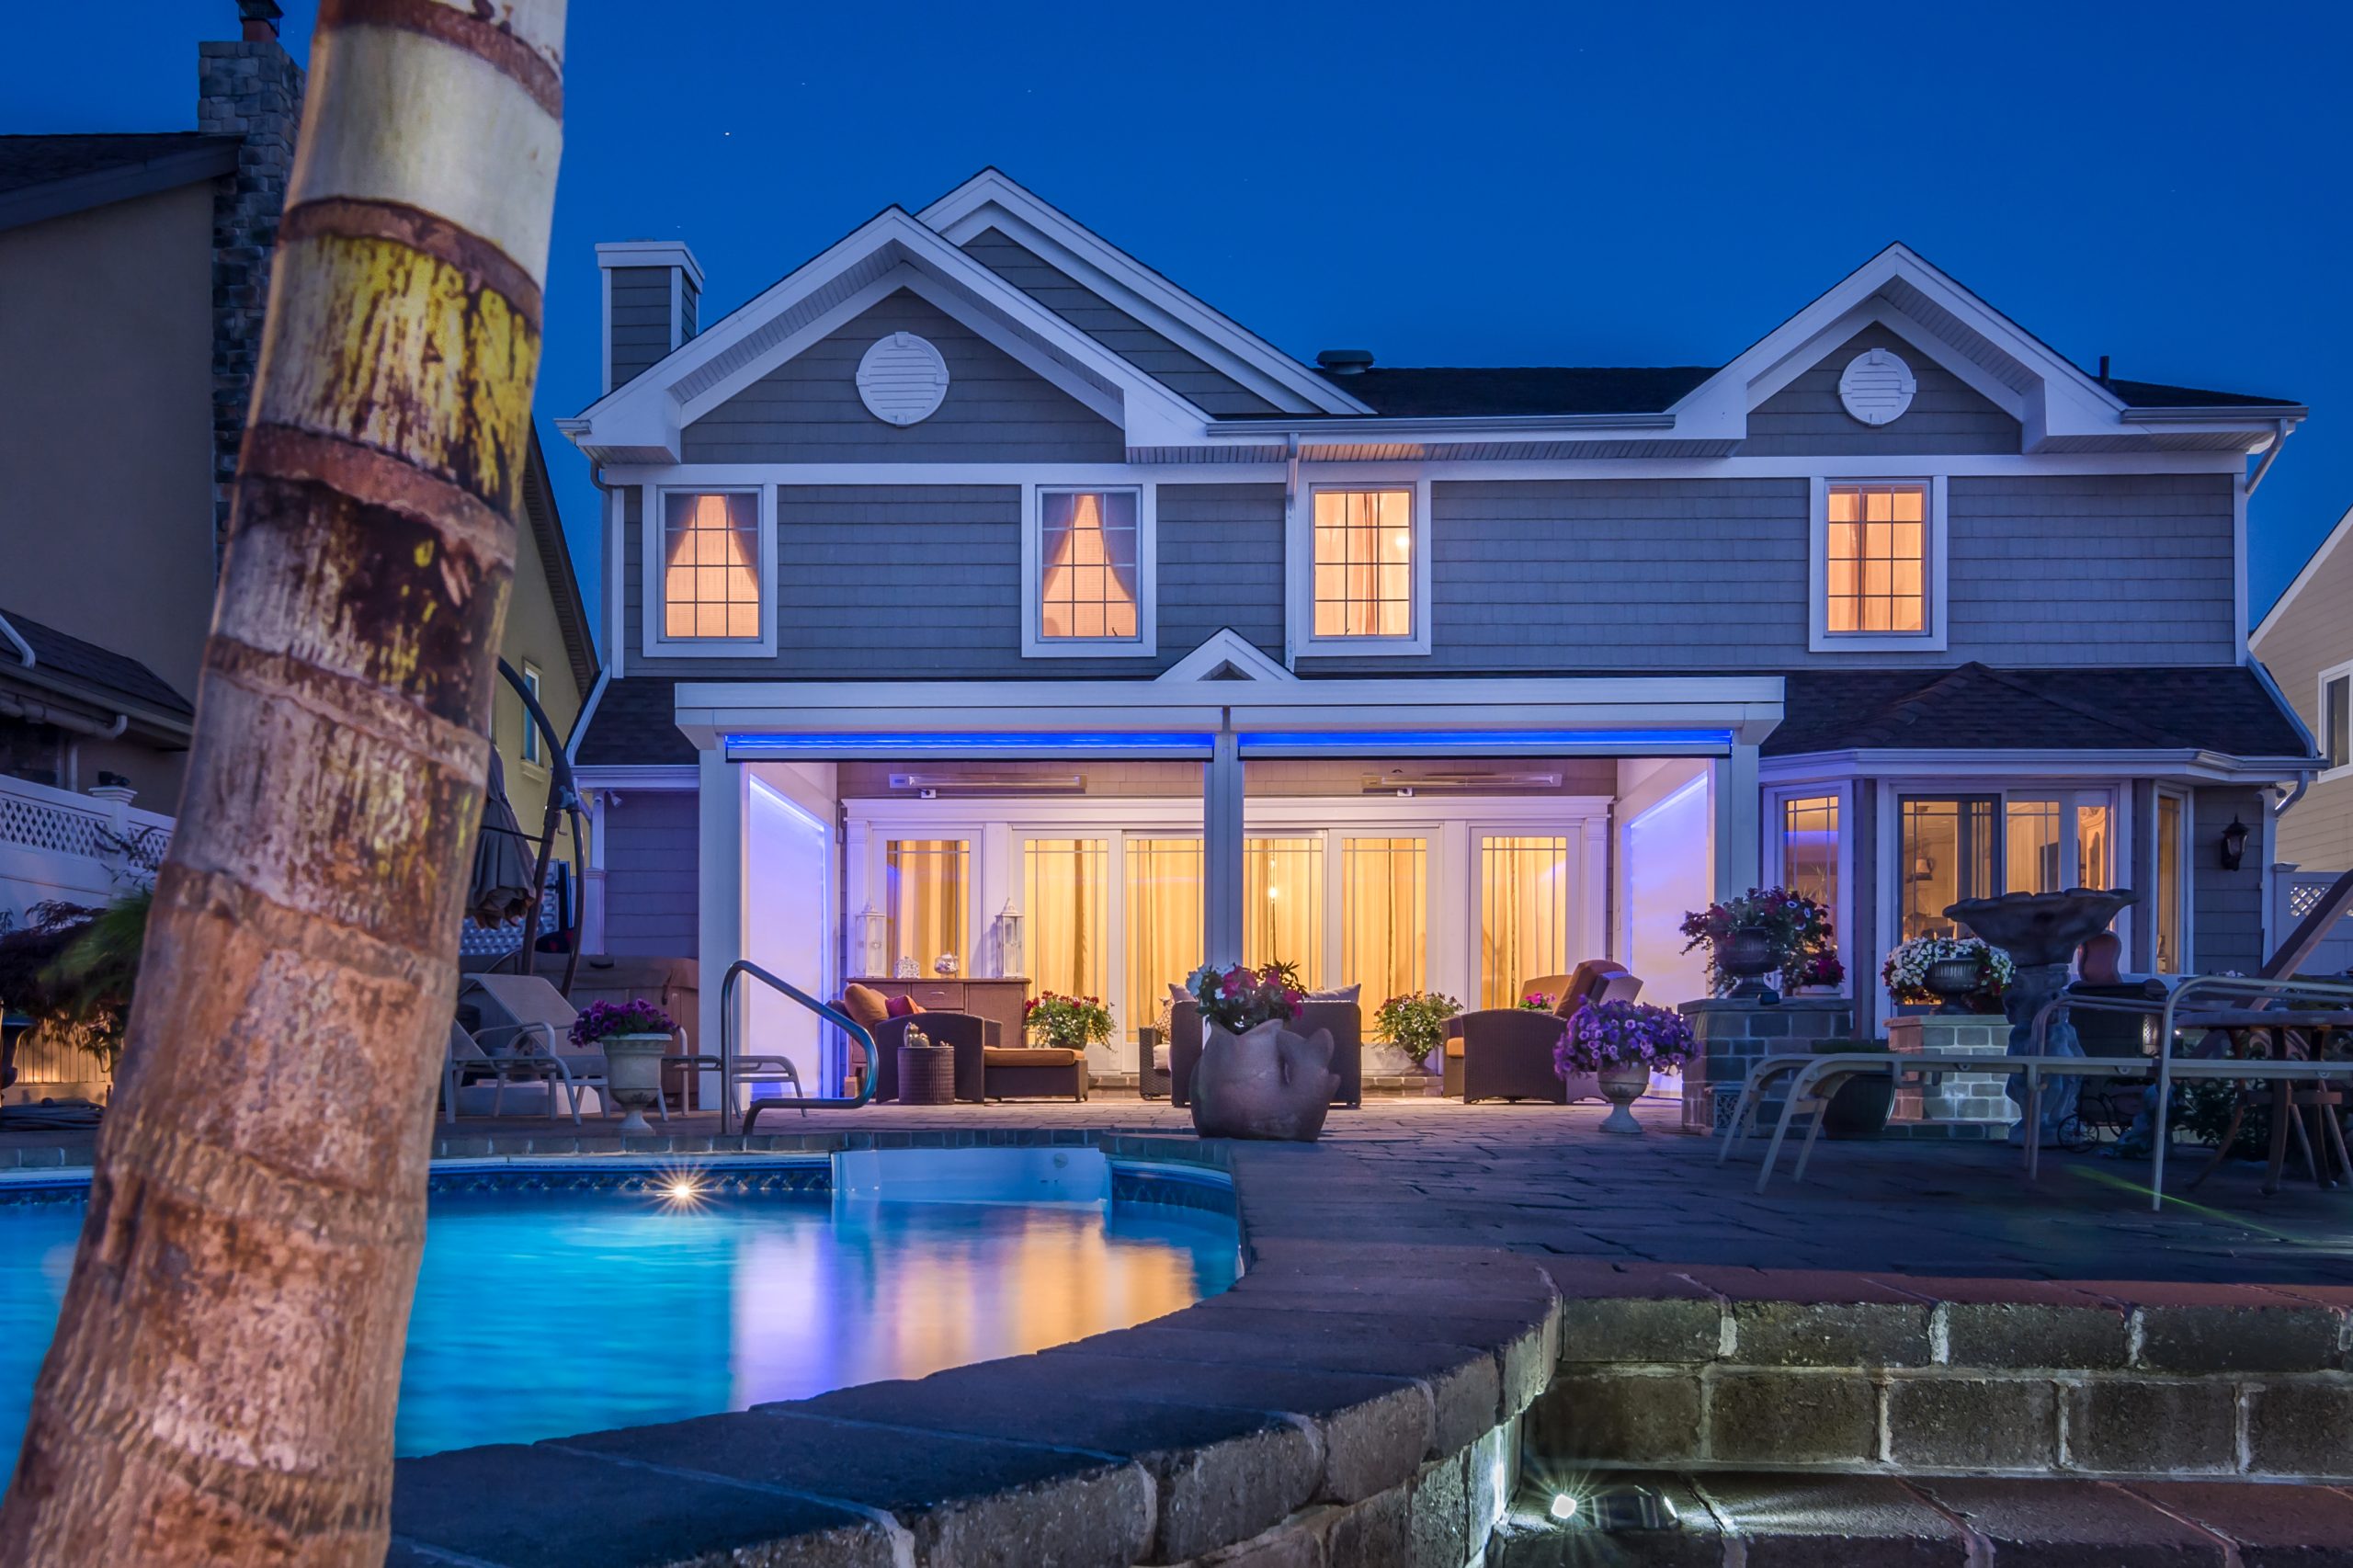
A LifeRoom helps you make the most of everything your home should be. A home is, ideally, a place of comfort and relaxation. Adding a LifeRoom to your Northern VA home by enclosing a porch or patio allows you to enjoy nature in a new way. Your new LifeRoom home addition is created with glass walls and ceilings, windows and screens, or a combination of these elements. You can customize your LifeRoom with unique lighting options, custom shutters, arched glass eaves –and much more. With a LifeRoom, you, your family and friends can live an indoor-outdoor lifestyle in complete comfort year-round.

Expand Your Home’s Options with a LifeRoom

At Stoneridge Outdoor Living, we specialize in creating your perfect LifeRoom. We ensure that your new home addition’s design has all the qualities and features you’re seeking. Then we meticulously construct it with superior craftsmanship to add value to your home and transform your at-home lifestyle. Our projects are always completed on a short timeline, so you can begin enjoying your LifeRoom right away.

How We Customize Your LifeRoom: Popular Features

Your life isn’t like anyone else’s, so your LifeRoom must also be unique. Available atmospheric and comfort features can allow you to:

  • Enjoy mid-summer comfort with cool mist temperature control or soft breeze technology to dry and cool the air.
  • Create the right mood with adjustable lighting options.
  • Increase privacy or open up the view, on demand, with remote control blinds.
  • Let outdoor sounds and breeze in (or shut out inclement weather, as needed) by adjusting expansive glass windows and/or screens.
  • Keep out insects and allergens and gain significant protection from the sun’s harmful UV radiation, even if you opt for LifeRoom motorized screens only.
  • Adjust your environment conveniently from your seat, as most features are operated via remote control and move into place silently at your command.
  • Comply with HOA guidelines and construction guidelines, if any.
  • And more!

Creative Ways to Use Your New LifeRoom

  • Enjoy outdoor views and landscaping in complete comfort, nearly any time of year.
  • Entertain guests and celebrate with nature all around.
  • Watch a rainstorm from your LifeRoom.
  • Eat breakfast in a lovely, quiet setting before starting your day.
  • Take a break and read a good book in your favorite chair.
  • Let indoor pets enjoy fresh air and a natural setting.
  • Play board games with the family or even screen a movie.
  • Have a romantic dinner with someone special.

LifeRoom Design & Construction in VA, WV & MD

Stoneridge Outdoor Living is your local LifeRoom specialist. Our team has constructed LifeRooms throughout Virginia, DC, and Maryland for over a decade. Ready to make your home unique and increase its value with a LifeRoom home addition? Contact Stoneridge Outdoor Living online or call 877-309-8445 today!

What Is a Four Season Room?

Do you ever wish you could enjoy the outdoors in complete comfort any day or evening of the year here in the Washington, DC or Northern VA area? A four season room is the perfect solution that allows you to be outdoors, in nature, in almost any weather–without leaving the comfort of your Richmond-area home. A four season room provides you safe, comfortable shelter and complete climate control along with an uninterrupted view of your surrounding landscape and breathtaking skyline. This versatile living space is an expansion of your home, done in a creative, effective manner–by enclosing a porch, deck, or balcony. The straightforward construction of a four season room makes the indoor-outdoor room a great investment. It’s a relatively low-cost, quick home renovation that expands your living space, giving you more usable square footage to enjoy. Your four season room adds value to your VA, WV, or MD home, providing a unique, enviable home space for you to enjoy and share with others.

Building Your Four Season Sunroom

If the idea of a complicated, inconvenient construction project seems daunting, you’ll love the rapid, organized construction process of your new four season room. As expert local contractors specializing in creating four season rooms, sunrooms, conservatories, and screened porches, Stoneridge Outdoor Living builds your new four season room around your existing porch or balcony area. We don’t need to pour a new foundation, add messy insulation, install wall studs, etc. We can create your new sunroom quickly and efficiently. The glass we use provides excellent insulation and, of course, a stunning 360-degree view for you to enjoy in all seasons.

Features of Your Four Season Room by Stoneridge Outdoor Living

Your new addition, built by the leading four seasons room contractor in Virginia, may include:

  • Tempered glass construction for beauty and strength
  • Fully retracting, silent, remote controlled screens
  • Energy-efficient structure that can shut out the elements and block a significant amount of UV radiation
  • Variety of styles, including conservatory, cathedral style, straight eave, curved eave, and more
  • Mood lighting
  • Misting system or soft breeze cooling
  • Lifetime warranty (transferable if you sell your home)
  • Senior or military discounts
  • And more!

How Can You Use a Four Season Room?

You can bring nature into your home with a four season room, giving you a place to relax quietly alone, spend time with family, or host friends for special occasions. You can use your four season room year round, in any way you desire. Imagine the possibilities and create your own traditions in your spectacular new space.

Install a Four Season Room in DC, Northern VA & the Richmond Area

At Stoneridge Outdoor Living, we’ll help you create your ideal four season room, built to the exact specifications you desire. The four season room experts at Stoneridge Outdoor Living will ensure that your new indoor-outdoor room blends seamlessly with the rest of your home’s architecture. Contact our team today by calling 877-309-8445 to learn more about the options for your new four season room!

Upgrade Your Flooring

Installing a hardwood floor can take longer than a weekend, so choose a material that’s less time-consuming. Start with anything that comes in a roll, such as sheet vinyl, which looks better and lasts longer than it used to.
#weekend #DIY #homeimprovement #upgrade #budget #summer #handyman Installing a hardwood floor can take longer than a weekend, so choose a material that’s less time-consuming. Start with anything that comes in a roll, such as sheet vinyl, which looks better and lasts longer than it used to.
#weekend #DIY #homeimprovement #upgrade #budget #summer #handyman

Spice Up Your Stairway

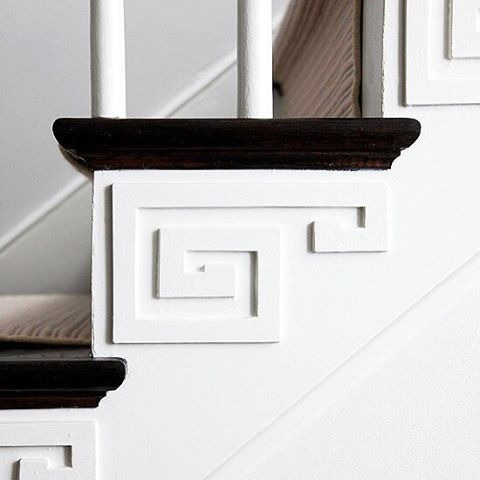
Add drama to a staircase with distinctive railings or embellishments. Architectural-salvage and reuse centers are hot spots for ideas and materials.
#weekend #DIY #homeimprovement #upgrade #budget #summer #handyman #stairway #drama Add drama to a staircase with distinctive railings or embellishments. Architectural-salvage and reuse centers are hot spots for ideas and materials.
#weekend #DIY #homeimprovement #upgrade #budget #summer #handyman #stairway #drama

What to Do If Your Deck Is Rotting

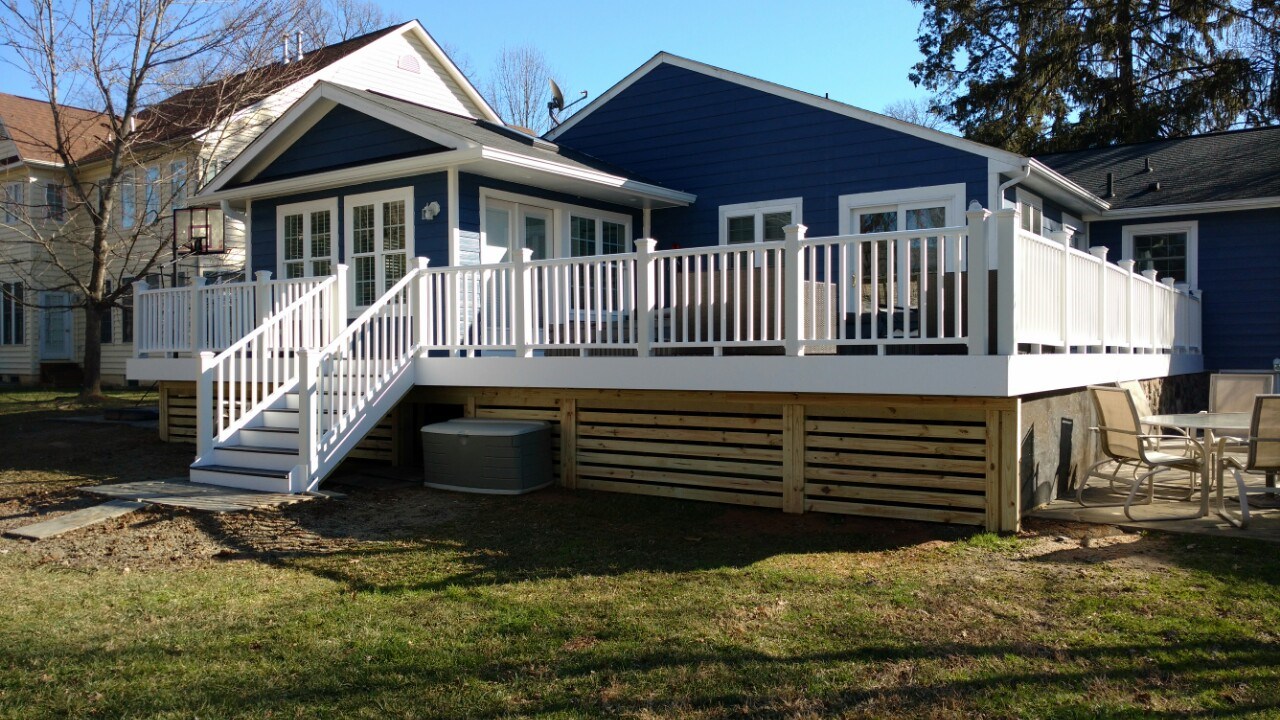
Most homeowners choose to build their decks with wood for a variety of reasons, including the large selection of wood available and the strength and durability of wood over other materials. Though it’s true wood may be stronger and longer-lasting than other materials, it won’t last forever and it’s certainly not indestructible. Over time, you may begin to discover that your wood deck has begun to rot. When this happens, it’s important to address the issue before it turns into something much more difficult to deal with. A rotted deck can be hazardous for you and your family and a huge risk during severe weather, and it ultimately can look unappealing to say the least.

Why Do Wood Decks Rot?

You can do everything possible to keep your wood deck clean, such as making sure to clean between the boards, but sometimes deterioration and rot can still occur. Pressure-treated wood decks usually prevent rot for longer, and certain types of wood are less prone to rot and have a longer lifespan, but wood rot can be a slow process and you may not notice until it’s too late. There are a number of factors that can contribute to the rot of your wood deck, but these are the most common:

  • Termites – These tiny creatures can have a big impact on wood. There isn’t a 100% proven method for making wood termite-proof yet, so it can be difficult to prevent an infestation of these insects from devouring your deck.
  • Weather – Northern Virginia isn’t exactly the Arctic, but the temperature can often dip below freezing during the winter. During these low temperatures, what is known as the freeze-thaw cycle can occur. The wood in the deck expands in the cold and returns to its original size when it gets warm again. This vicious cycle can eventually cause cracks in the wood coating and weaken its basic structure over time. Melted snow and ice can enter these cracks and begin to cause rot.
  • Standing water – Having a slightly uneven deck surface can cause water to pool in one spot. If this water stays in that location too long, there is a chance rot can occur. This can also happen in any areas where the wood may dip down, creating a small valley for the water to collect.
  • Untreated wood – If your deck’s wood is untreated, this leaves it much more vulnerable to the effects of weather. Precipitation like rain and snow will leave your deck wet for longer, and the melting snow creates excessive moisture. This extended wetness combined with the sun’s radiation will slowly cause damage and rot to your deck.
  • Debris between boards – When you don’t clean between your deck’s boards as often as you should, leaves and other debris can become trapped. This debris begins to rot over time and organisms like fungi and bacteria begin to grow, eventually eating away the wood.

How to Repair a Rotting Wood Deck

Once your deck has begun rotting, it can be very difficult to repair the damage it has already caused. It is much easier to address any wood rot damage if you can catch it early, but your best bet is to prevent the rot from occurring in the first place. That being said, it can be possible to repair your deck from rot without replacing the whole thing if you discover the issue early on. Here’s what you can do:

Contact Stoneridge Outdoor Living for Wood Deck Rot Repair

Catching rot early and addressing the issue before it spreads is the best way to successfully treat rot damage. But it’s not always easy to spot the signs of rot before it becomes a problem. Our trained deck specialists at Stoneridge Outdoor Living have the knowledge and experience to diagnose the symptoms of invisible rot. They also know what solution works best for different types of wood in order to effectively create a stronger deck that is more resistant to rot. The team at Stoneridge Outdoor Living has years of experience dealing with rotting decks, and are standing by to help solve your rot problem. Our professionals will come out to perform an inspection of your home’s wood deck, and if they find an issue, we can get to work to prevent any further damage. If there isn’t any rot, we can put preventative measures in place to help make sure you won’t need to call for rot repair in the future. Contact us online or give our team a call at 877-309-8445 to learn more about our deck services, or to schedule wood deck rot repair today!

Replace an Appliance

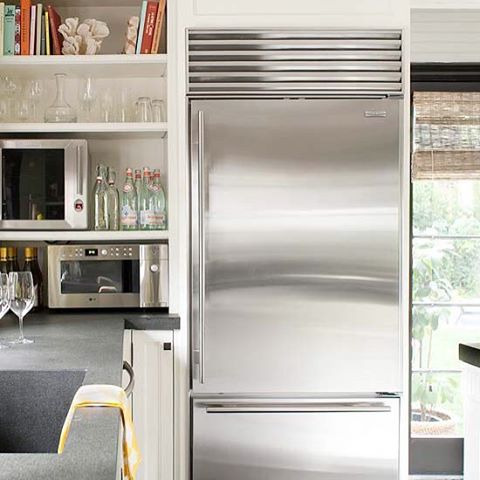
If you bought your refrigerator before 1993 or your dishwasher before 1994, when the federal energy-efficiency guidelines for each went into effect, consider replacing them with more efficient models. Some newer models use at least 15 percent less energy than required by current federal standards and 40 percent less energy than the conventional models sold in 2001.
#weekend #DIY #homeimprovement #upgrade #budget #summer #handyman #energy #efficiency If you bought your refrigerator before 1993 or your dishwasher before 1994, when the federal energy-efficiency guidelines for each went into effect, consider replacing them with more efficient models. Some newer models use at least 15 percent less energy than required by current federal standards and 40 percent less energy than the conventional models sold in 2001.
#weekend #DIY #homeimprovement #upgrade #budget #summer #handyman #energy #efficiency

Redo Your Backsplash

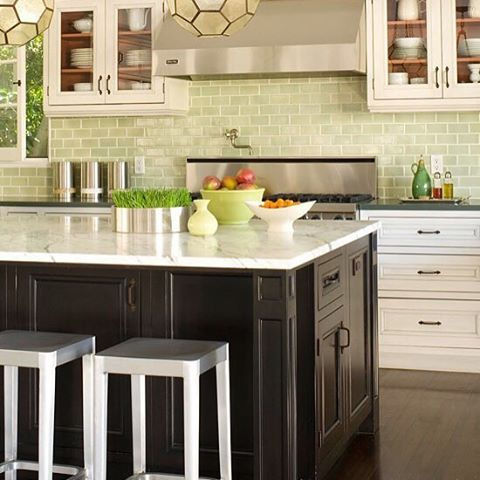
Tired of a dull kitchen? Transform the mood of the kitchen with a bold new backsplash in ceramic or glass tile. Just make sure the wall is sound before you start the installation.
#weekend #DIY #homeimprovement #upgrade #budget #summer #handyman #kitchen #backsplash Tired of a dull kitchen? Transform the mood of the kitchen with a bold new backsplash in ceramic or glass tile. Just make sure the wall is sound before you start the installation.
#weekend #DIY #homeimprovement #upgrade #budget #summer #handyman #kitchen #backsplash

Put Dimmers on the Lights

Dimmer switches quickly give your dining room the atmosphere of a swank restaurant. You can use standard incandescent bulbs, but if you prefer fluorescent light, look for special dimmable bulbs.
#weekend #DIY #homeimprovement #upgrade #budget #summer #handyman #dimmer #lighting Dimmer switches quickly give your dining room the atmosphere of a swank restaurant. You can use standard incandescent bulbs, but if you prefer fluorescent light, look for special dimmable bulbs.
#weekend #DIY #homeimprovement #upgrade #budget #summer #handyman #dimmer #lighting

Patch Holes in Walls

Whether an art-arranging project went awry or you’re tired of looking at dings around the house, concealing wall blemishes is a weekend-worthy project. With a putty knife and surfacing compound, you can easily repair nail holes and other minor wall imperfections. For larger holes, place an adhesive patch over the area and spread an all-purpose drywall compound over it with a trowel. Depending on the size of the wall hole, the compound may need to dry overnight. Paint over the patch when it is dry.
#weekend #DIY #homeimprovement #upgrade #budget #summer #handyman #patch #holes Whether an art-arranging project went awry or you’re tired of looking at dings around the house, concealing wall blemishes is a weekend-worthy project. With a putty knife and surfacing compound, you can easily repair nail holes and other minor wall imperfections. For larger holes, place an adhesive patch over the area and spread an all-purpose drywall compound over it with a trowel. Depending on the size of the wall hole, the compound may need to dry overnight. Paint over the patch when it is dry.
#weekend #DIY #homeimprovement #upgrade #budget #summer #handyman #patch #holes